Showing posts with label West Coast Artist. Show all posts

Jun 6, 2022

Why Collage Fodder is good for Watercolour Painters - Painting & Drawing Tips


I recently entered a NEW WORLD!
Some of my Mushroom Collage Fodder 

A World I never knew existed.  In a way, I think I felt like a Scientist that just discovered a New Star or a New Species.  How could I have missed this ? How long has it been in Existence?  Where did it come from?  
I know I am not a Collage Artist but really.  I do get around in the Art World, how did I miss this.  


Collage Fodder?? !!
What is it?  It is any material that can be used for Collaging.  Of course we have all seen work where artist are collecting, cutting, ripping and gluing things to make interesting new Art Work.  But I never really thought about Artists actively making the stuff they were going to cut up.  It always seemed like they 'collected it'. 

Well Artists do. Make it that is.  And it is the Collage Artists secret way of having TONS of FUN.  They make all kinds of things: patterns, flowers, people, leaves, writings, you name it. Not only make but sell it as well.  It is themed, colour coordinated, stylized, and more.  As I say A WHOLE NEW WORLD.  

No, I am not becoming a Collage Artists, but  . . . 

There is tons that can be learned from making Collage Fodder and using it in your work.  

NB.  My video "Why Should Watercolour Artist make Collage Fodder?"  has more information and ideas on Collage Fodder. Be sure and Check it out.   

Collage Fodder 101
 Right now my thing is Mushrooms so that was my  Collage Fodder Theme.
  
1. Draw mushrooms.  Lots of different shapes and sizes on a scrap piece of watercolour paper. May sure you do several of the same kind of shape, some big and some small.  (Great quick drawing practice) 

Painting my Mushrooms - trying different colours 


2.  Paint them: This was fun.  I painted them all different kinds of colours, used glazing, blending and mixing techniques.  I tried different shadows and shadow colours.  I experimented with different colour palettes.  ( Great quick watercolour practice, not only technique but colour theory )  

The fun part - adding little details 


3.  Grab Markers: I used coloured pens and white pens.  Outline and decorate your mushrooms once the paint is dry This was definitely fun.  Adding little decorations, bringing them to life.  (Fun drawing practice with pens)

Cutting out my Mushrooms - many I shouldn't have made such interesting shapes


4.  Cut your mushrooms out. Ok this is a little slow and tedious.  But afterwards fun to see how neat they looked. (cutting practice, no real benefit to a watercolourist I know but . . .)  

5.  Use your mushrooms. 
a.  Create your own collage page in your sketchbook (Practice in composition, colour theory, painting and drawing) I had fun just playing with the colour and working with my pen.  

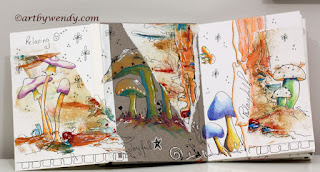
Tried my hand at a little mix media 

b.  Decorate a Journal Page (Practice in composition, colour theory)  Simple little things can really make your pages more interesting and inviting.  You must admit these two chubby little mushrooms bring a smile to your face.  

Little decoration on my Journal Page 


c.  Make a Cover for a Sketchbook (Practice in composition, colour theory, painting and drawing) What can be nicer than to make your own sketchbook and design your own cover. I have only 2 pages left in my last creative sketchbook, I can hardly wait to crack this new one open.  

Front Cover of my New Sketchbook


d.  Build a painting around your mushrooms.  (Practice in composition, colour theory, painting and drawing)

Using your Collage Fodder will inspire you to do NEW Things. . . .

There are many different ways to use your Collage Fodder, but no matter what, you are getting a lot of skills working with it.  And I must add having Fun.  When working on your regular work your are focused on what you know.  There is pressure to do well.  So you stick to tried and true methods.  This is not the area for experimentation.  I can guarantee that making a little Fodder and using it, will stretch you out into new places. 

NB.  My video "Why Should Watercolour Artist make Collage Fodder?"  has more information and ideas on Collage Fodder. Be sure and Check it out.   

So next time you are at loose ends, grab some paper and start your own Collage Fodder collection.  

Outdoor Sketching Classes - On Now!!

Outdoor Sketching Classes are 2.5 hr sessions and located in parks in North Surrey and North Langley.  Beginners to Advanced are Welcome.  Mediums supported: watercolour, pen, pencil, watercolour pencils and coloured pencils.  You can sign up to as many sessions as you like.  Class Size: Max 3.  $50 per session.  

Class Dates: 
June 9 & 16: 10-12:30pm
July 7 & 28: 10-12:30pm
Aug 4 & 25: 10-12:30pm
Sept 1: 10-12:30pm 

Arrangements made for inclement weather.  
You are welcome to contact me for help in organizing your supplies for an Outing.  

 I am available for booking special outings for you and 1-2 of your friends. 

Gift Certificates are Available

Contact Wendy to register 

 Move your work to NEW LEVELS?  

Contact Me for:

1. Private Drawing Lesson: (3 Sessions 2.5 hr each $250)  North Langley, BC (Walnut Grove) 
Do you want your animals to breath, your flowers to sparkle or your people to walk?  Whatever subject your like to paint or draw I can build a drawing program for you.  Private Lessons allow you to focus on the skills you wish to develop.  Wendy is a experienced teacher, providing a calm, relaxing experience as you learn how to use the principles of drawing.  Beginner to Advanced are welcome.  Special rates for younger students.  Contact Wendy for More info

2.  Online: Teaching, Mentoring or Critiquing Your Work - Don't live in the Fraser Valley,  I would be happy to tailor a program just for you online.  Drawing and Painting Lessons, Mentoring you on your Art Journey or Critiquing Your Work with an Eye to Move It Forward.  Drawing & Painting Lessons: 2-30 sessions $75.  Mentoring or Critiquing 30 minutes sessions $25.  Flexible schedule and sessions can be longer or shorter depending on your goals. 

3.  Available at Art by Wendy's Studio
Original work, Commissions, Prints and Cards of her Work, 

Be sure to like and share my posts.  You won't miss a single post if you Follow by Email 
Have a great Artful Day,
Wendy

Apr 18, 2022

Learning to Draw with your Pen Joyfully - Painting & Drawing Tips

Are you planning your Spring Planting?  Looking at seed catalogues?  
Wondering in the Garden Shops?
Bringing home the bundles of Tulips from the grocery store?

POPPIES IN THE FIELD  - Sketchbook Practice 

Spring is nearly here. I am hounding the garden shops, checking out the flower beds on my daily walks, waiting for the colour.  

 I don’t have a big garden any more but I love to have a few baskets on the steps and patio.  I find I love the neat lines of colour as I set my pots in place.  But somehow as the weather warms and the plants grow, things become wild and free.  I love that look even more.

 Drawing with a pen is like that. . .

Do you find as you start to draw with pen there is a feeling of permanence. The marks must be exact.  It can not be changed. Lines are neat and orderly. 

But the lines can be like those flowers, once they begin to grow they can become wild and free.  Full of confidence and joy. 

 But, How you ask, can one get that confidence and Joy.

The answer is practice.  But of course there is more to it than that.  Meaningful practice helps.  But I find practice only works if I feel some success.  A sense of growth.  A feeling of confidence. Joy. 

A Joyful Way to Get Loose with your Pen

NB: There is a video version of the blog post with more examples - See "Get Loose with Your Pen Work" video.  

1.  Grab your watercolours and a brush - no reference - just put blobs of paint on the page to indicate where a flower might go.  5 blobs is a good starting point.  

 My 5 blubs of colour

2.  Loosely paint in stems and branches.  Keep you colour light so ink work will show later.  

Don't worry about making perfect leaves, have fun with the shapes

Working without a references helps gives freedom to your line work. It feels scary, I know, but you will see you don't really need one.  Drawing like this helps you move freely on the page and not feel any of your marks are 'wrong'.  

3.  Practice this simple poppy flower.  While your paint is drying practice making this simple poppy.  Make them all different sizes and facing in different directions. 

Draw the bottom 2 petals first, then add the 3 at the back

4.  Draw flowers, leaves and stems on your painting.  Don't worry about keeping the colour inside the lines.  You will see the lines will capture they colour as you go.  Also, having a bit of white space inside your shapes, creates a lot of interest. 

Drawing the flowers, stems and leaves

5.  Keep drawing until you are finished.  Don't hesitate to add more leaves and flowers to fit your scene, even if there is no painted area for them.  Note my finished picture at the beginning of the post,  has a leaf added to the left side and there is no paint there.  

6.  Try working with another shape.  I have painted a simple log and stump shape in my book. I did play with a few lights and darks but tried to keep it simple.  ( I did get a little carried away as I love painting and drawing old stumps. )

My simple log and stump  

2.  Adding line work.  Picture a log and stump in your mind and start some line work.  Don't worry about staying within the coloured area.  Note the bits of white on my stump where I enlarged it and reshaped it.  Add marks: light, dark, squiggles, dots.  Watch and see what they do.  Sometimes encapsulate the darker values and other times ignore them.  Let your pen move freely.  

Add a bit of foliage.  Stumps and logs always have leaves, sticks, and plants scattered around them. 

Note how my line work breaths life into this simple painting

3.  Adding more colour.  This is always an option after you add your pen work. I encourage you to do this after you add your ink work.  This will help you feel loose and free.  Too much colour detail makes you want to follow the lines.  Remember when you add the extra colour it does not have to fit into the line work.  In fact leaves for example with no line work add depth to your bushes. (Note my bushes on the left side of the stump)

A Simple picture but one that makes me happy when I look at it.  

This might be a new way for you to practice your line work but I think you will find it rewarding and helpful in building your confidence and finding your joy.  

You will find more examples and further information in the video version of the blog post - See "Get Loose with Your Pen Work" video.  

Outdoor Sketching Classes - Starting May 27!!!

Outdoor Sketching Classes are 2.5 hr sessions and located in parks in North Surrey and North Langley.  Beginners to Advanced are Welcome.  Mediums supported: watercolour, pen, pencil, watercolour pencils and coloured pencils.  You can sign up to as many sessions as you like.  Class Size: Max 3.  $50 per session.  

Class Dates: 
May 27: 10-12:30pm
June 9 & 16: 10-12:30pm
July 7 & 21: 10-12:30pm
Aug 4 & 25: 10-12:30pm
Sept 1 & 8: 10-12:30pm 

Arrangements made for inclement weather.  
You are welcome to contact me for help in organizing your supplies for an Outing.  

 I am available for booking special outings for you and 1-2 of your friends. 

Gift Certificates are Available

Contact Wendy to register 

 Move your work to NEW LEVELS?  

Contact Me for:

1. Private Drawing Lesson: (3 Sessions 2.5 hr each $250)  North Langley, BC (Walnut Grove) 
Do you want your animals to breath, your flowers to sparkle or your people to walk?  Whatever subject your like to paint or draw I can build a drawing program for you.  Private Lessons allow you to focus on the skills you wish to develop.  Wendy is a experienced teacher, providing a calm, relaxing experience as you learn how to use the principles of drawing.  Beginner to Advanced are welcome.  Special rates for younger students.  Contact Wendy for More info

2.  Online: Teaching, Mentoring or Critiquing Your Work - Don't live in the Fraser Valley,  I would be happy to tailor a program just for you online.  Drawing and Painting Lessons, Mentoring you on your Art Journey or Critiquing Your Work with an Eye to Move It Forward.  Drawing & Painting Lessons: 2-30 sessions $75.  Mentoring or Critiquing 30 minutes sessions $25.  Flexible schedule and sessions can be longer or shorter depending on your goals. 

3.  Available at Art by Wendy's Studio
Original work, Commissions, Prints and Cards of her Work, 

Be sure to like and share my posts.  You won't miss a single post if you Follow by Email 
Have a great Artful Day,
Wendy

Feb 9, 2022

Let Ambient Light put a Sparkle into Your Work - Paint & Drawing Tips

Who doesn't love the Soft Glow of a campfire in the Evening Light?
Everything feels warm and cozy.  Everything tinted gold.  

AFTERNOON TEA - watercolour, 16 x 20  - Note the rosy glow on the hummingbird


When we were in Maui, I always found it amazing how many people gravitated to the beaches when the sun was starting to set. But I guess we all felt the same thing.  As the rosy blush of the sunset washed over the world, everything felt just right. 

This is Ambient Light at its best.  . . .

The rosy red colours of sunset are light rays bouncing around.  The colour tinting everything it touches.  It is easy to see.    

However, there are more subtle forms of Ambient Light . . .

Even as the sun gives light,  each object below, does as well.  As artists we are not really concerned with the physics involved with bouncing light rays but rather how it affects everything we paint. 

(NB. There is a video version of this post with more information on YouTube: Let Ambient Light put a Sparkle into Your Work )


The Subtle touches of  Ambient Light  . . . .

 Looking at this green apple note the shadow side of the apple. This is the view we all see and remember. 

Green apple with White Background.

Now watch what happens as I change the background colour to blue.  Can you see the difference in the colour of the apple.  Especially in the shadow area.  

Green Apple with Blue Background

Another colour change.  This time an orange background. 

Apple with an Orange Background

As the colours change beside the apple you can see the colour of the apple changes as well.  It still is green but there is colour reflected by the background.  It is not a direct light nor a bright one.  It is the ambient reflected light from the neighbouring object.  Neat eh?!  

Arbutus Tree on the Bluff - Ignoring Ambient Light when painting

Ambient Light in Action
I have here a little landscape painting, the kind of thing I love to paint when Outdoor Sketching.  An arbutus tree standing proudly on the rock bluff, scraggy shrubs fighting to survive on the rocky cliff all beneath a summer sky.  
I started the painting keeping each subject as separate as possible.  Greens for the shrubs.  Grays for the rocks. Reds and browns for the arbutus tree.  And blues for the sky.  A pretty scene for sure. 

But what happens if . . . ..

I add the reflections of Ambient Light for each of the elements in the scene.  That means the reflective light of the green shrubs onto the rocks, the tree, the sky.  The reflective light of the reds of the tree onto the shrubs, rocks and sky.  The blues of the sky reflected on  . . . .  Letting each element have its own mini reflective light play out in my picture.    
Close Up showing the large rock and ground before and after the colours of the ambient light are added

Above your can see the ground now carries some reds, browns and golds from the tree and the blues of the sky.  I really like how they add a sparkle to the ground cover.  Even the rock takes on a new life with the greens, blues, reds and browns reflected into it.  

Before and After - Arbutus Tree on the Bluff 

Can you see the sparkle in the After Picture.  Even the sky has more life with the bits of red, yellow and green added to it.  Including the Ambient Reflective Light in your work adds that sparkle but also integrates your pieces and makes them come together.  

My Favourite example of Ambient Light in a Portrait . . .

An artist's whose work I really enjoy is Harley Brown.  He is a Canadian Artist that has won many awards and lots of recognition for his pastel portraits of Indigenous People.  I love the way he uses his background colours to bring his portraits to life.  Not only alive but infused with colour.  Sometimes in a subtle way but other times very bold and bright.   

Have fun adding the Ambient Reflective Light to your paintings and see if put a Sparkle into your work.  

NB.  There is a video version of this post with more information on YouTube: Let Ambient Light put a Sparkle into Your Work 

 Move your work to NEW LEVELS?  

Contact Me for:

1. Private Drawing Lesson: (3 Sessions 2.5 hr each $250)  North Langley, BC (Walnut Grove) 
Do you want your animals to breath, your flowers to sparkle or your people to walk?  Whatever subject your like to paint or draw I can build a drawing program for you.  Private Lessons allow you to focus on the skills you wish to develop.  Wendy is a experienced teacher, providing a calm, relaxing experience as you learn how to use the principles of drawing.  Beginner to Advanced are welcome.  Special rates for younger students.  More info here.

2.  Online: Teaching, Mentoring or Critiquing Your Work - Don't live in the Fraser Valley,  I would be happy to tailor a program just for you online.  Drawing and Painting Lessons, Mentoring you on your Art Journey or Critiquing Your Work with an Eye to Move It Forward.  Drawing & Painting Lessons: 1.5 hr sessions $75.  Mentoring or Critiquing 30 minutes sessions $25.  Flexible schedule and sessions can be longer or shorter depending on your goals. 

Be sure to like and share my posts.  You won't miss a single post if you Follow by Email 
Have a great Artful Day,
Wendy

Jan 17, 2022

3 Ways to BE more Intuitive in Your Painting - Painting & Drawing Tips

Working in my Studio, I sometimes feel my work is a flat.  
It is winter now.  We had our burst of snowy, crisp, sunny days.  But now we are back to Wet, Dreary, Gray Ones.  
Bright Sunshine and Colour seem very far away.  

FRIENDLY GUYS - Intuitive Approach meets Control Freak - In a Joyful Way


It's times like this I feel my work becomes more rigid.  I plan, I execute, I finish.  I am in total control.  

I know, sometimes that feels great but other times . . . . . . it feels restrictive.  

I am looking for that balance, of control and yet a looseness that adds sparkle and surprises in my work. I want to be more Intuitive.  

What is Intuitive Painting? 
What does it mean to work Intuitively? 
 How can that mesh with my Process?

These are questions I have been focusing on for some time.  Here are some of the things I have learned. 

What does it mean to paint/work Intuitively?
This is focused on your approach to your work. It is about self discovery, spontaneity, exploring but most of all, having a fearless approach to art.  

Wow!  That is a hard one for me, I am a bit of a control freak.  After all, I am a wildlife artist that enjoys realism.  

Intuitive Approach meets Control Freak

3 Ways to ACT more Intuitively
Yip, that's me. Trying to break out of my box but not loose myself in the process.  

1.  Change up the Colour
This is area I have really been working on for awhile and I feel I have found some success.  Working with  birds and animals, requires a setting.  Nature settings are often a sea of greens or blues, depending on landscape or waterscape settings. 

Have you every got lost in the greens of summer?  

MOSSY TREE - What Can be Greener than a moss covered Tree Stump?  

Becoming more Intuitive in my response to colour has really changed the world for me. My painting of the Mossy Tree was a breakthrough painting for me.  I pushed myself to try different colours with my greens.  The Sparkle of the reds and oranges in the sunlight and the blues in the shadows was very freeing for me.    Now, I find I like to push myself to introduce new colours all the time. Especially when things are starting to feel flat!!  

2.  Make A Big Shape
It's the big shapes that can catch you. The plans are set.  Your layout is complete but things are not right.  There is a feeling of incompleteness.  (not sure that is a word but it certainly is a feeling. )  This is when disappointment, a sense of fear set in.  What if I wreck it? 

My Answer: I use my bare hand.  . . .

Using my hand I can see that a shape at the top left doesn't look as nice as one in the top right. 

I put my hand where the problem is.  Move it up. Down. Over. This gives me a feel for where something is needed and how big it must be.  

My Dalia was a flower drawing from a flower prompt.  This is a flower I seldom draw as the number of petals drives me crazy.  My focus was to draw the flower.  I did. Actually I was pleased with the results. But then what?  Using my hands a shape holders I can see that putting something in the top Right side and lower Left, seems to feel good to me.  How does it make you feel?  

Once I know the where, I need to decide the What.  Realistic or Abstract shape?  In the old days it would always be Realistic, now not so much.  It can even be a bit of both. I am leaning towards adding part of another flower on the side and a stem and a few leaves at the bottom.  But I am also thinking of a frame with the flower extending out or banners down the side or . . .  See what I mean. Once you have a direction, your imagination can ignite and flow.  

3.  Add Small Shapes
This has been a really fun addition to my work, that cam out of my Intuitive Research.  Tamara Laporte, is an artist I met online that I found really inspired me.  She makes realistic work with a very whimsical feel and she has a flare for colour.  Colours I love.  

One of her favourite things to do is add her own little symbols and decorative marks to all her drawings.  Some of her favourite shapes are stars, hearts, and castles. 

MUSHROOMS IN THE FOREST - Some of my favourite marks are circles, dots, and sometimes just squiggles  

Adding small touches can add excitement, interest and a bit of you to your piece.  I found it fun to take this idea and bring it into my work.  Organic shapes seem to catch my eye: Tiny flowers, leaves, curvy lines, circles and dots.  I was amazed how powerful a dot or circle can be.   These shapes create interest. They capture the eye.  They have the power to unify the composition.  

Adding my own Small Shapes adds Interest, Eye Candy and Unity to the Piece

My Research on Intuitive Painting and bringing it into my Process is ongoing.  To date I have found I have learned new things, gained more confidence and brought more joy into my work.  

Looking for More: 
"Putting More Intuitive Painting into Your Work with Wendy Mould" - Video:  Take an Intuitive Journey with me as I work on my Mushroom Story (Sketchbook Activity) 

Looking forward to hearing about your Intuitive Adventures.  See you next week. 

 Move your work to NEW LEVELS?  

Contact Me for:

1. Private Drawing Lesson: (3 Sessions 2.5 hr each $250)
Do you want your animals to breath, your flowers to sparkle or your people to walk?  Whatever subject your like to paint or draw I can build a drawing program for you.  Private Lessons allow you to focus on the skills you wish to develop.  Wendy is a experienced teacher, providing a calm, relaxing experience as you learn how to use the principles of drawing.  Beginner to Advanced are welcome.  Special rates for younger students.  More info here.

Be sure to like and share my posts.  You won't miss a single post if you Follow by Email 
Have a great Artful Day,
Wendy


Dec 1, 2021

Build Drawing Skills with DIY Christmas Tree Cards - Painting & Drawing Tips

OMG it has really been RAINING here!!

DIY Christmas Tree Cards - fun way to fight the winter drabs!!


I think everyone must have heard by now that here on the Southwest Coast of Canada we have had LOTS of RAIN!!  I am fortunate to not live in a flooded area. But I think of those people daily and what they must be going through.  Please say a little prayer for them and send them positive thoughts.  

Between Covid restrictions, the newest variant and the dark rainy days, I feel a bit of cheer and positive thinking is needed.  I know we are into the high tech days where everything happens on our phone or iPad but I feel we need to go back a bit to the 'touch and feel' days.  

There is nothing like feeling SPECIAL. 

It's a feeling you get when you opening the mailbox and there is card just for you.  Or when you meet a friend and they hand you a card.  Even more SPECIAL if they made that card themselves!  Suddenly it means soooo much more.   
 
Definitely a feeling of Peace with this little card.  😉


Check out my Christmas Tree Christmas Cards

They are user friendly, not too intimidating, one of a kind and guaranteed to give your special people a smile.  As an added bonus they allow you to easily feed your creative spirit.  They are something you can do while watching TV or listening to your music.  I suggest you make up a little supply box that is handy to grab whenever you have a minute.  

Creating DIY Christmas Tree Cards
I like Mixed Media Cards because I can use any media on them
SPECIAL NOTE: 
I have a video "Learn to Draw with Christmas Tree Cards" that will give you more ideas on making your Christmas Tree Cards.   
 
I have 2 Card Classes Scheduled: Tuesday, Dec 7,  2-4pm  & Saturday, Dec 11, 1-12:30pm 
Small group (3), all materials supplied, Beginner to Advanced Welcome, $50 each.  Walnut Grove area of Langley.  Contact Wendy to register

1.  Materials: 
- paper and envelopes - Strathmore has packages of Mixmedia paper cut and scored with envelopes ready to go. Scrapbooking/Stamp Stores let you buy cardstock by the sheet and have small packs of envelopes that can be purchased.  Envelopes can be expensive if you go to custom sizes so stick to standard ones.  (Even business envelopes make for an interesting card shape) 
I like white paper to work on as I love to add my own colour and I like the sharp, clean lines on my white surface. 
- pencil, vinyl eraser, kneaded eraser, white acrylic pen
- permanent ink pens: Staedtler or Micron 03 & 05  Using permanent ink means you can use wet media like felts or watercolour pencils and your lines wont run
My materials - note the white pen for making tiny corrections  

- your favourite colouring medium.  I like my Intense Watercolour Pencils because they give me bright colours but I also use my coloured pencils as well
- some Bling.  The dollar store has lots of little stick on glitter shapes.  The star shape is hard to find but little round ones work great too. (note them on the top of each tree above. )

2.  Layout
Decide on the size of your card face.  Do not fold card before working on it.  Cover the backside so only your drawing surface is showing. It is important to understand the size and shape your image will be. 

Note the paper covering the back and how light the markings are for the layout.  

Draw a light drawing of your tree/trees.  The layout should be dark enough to see but light enough to easily erase.  It should not score the surface.   Use your kneaded eraser to lighten any areas that are dark.  

When drawing your tree/trees think about curvy lines.  Try to move away from the idea of symmetrical.  Light gestural lines will give you great shapes to work with.  I like to dip the top over to give it a little character or round the top to make room for a piece of glitter at the top.  

Challenge yourself to try different sizes and groupings.  A few lines will indicate snow and I love my little snowballs under the trees.  They break up the line and move the eye along.  A few breaks in your snow lines also add interest for the eye.  

Layout for 3 trees - Challenge yourself to try different combinations 


3.  Draw with your Pen
Don't sweat it!  I know it is permanent.  Your layout lines do not need to be traced over exactly, they are to help you move along the surface.  If you made your trees a bit quirky, any deviation from your layout line will not matter. 

Single patterns give you more latitude for colouring. Note ow the shadows on the tree trunks and snow add to the composition.  

Add your patterns/doodles to your trees.  I like to fill in my trees with doodle patterns.  You can see my favourite ones but there are lots more on the Internet.  I find it is nicer to keep to one pattern per tree as it makes colouring more interesting.  But certainly a personal choice here.  Do a few practice patterns on another piece of paper and then draw directly onto your card.  
You will be surprised at how freeing that is.  That sense of moving the pen freely without tracing.  (I know you wont feel that right away but if you keep moving you will.  It is a real confidence busters) 

4.  Time to Colour & Decorate
Have some fun with your colours.  Add garnishes.  Add text.  And don't forget to sign it!! (My doodle signature is in the bottom right corner.  It is different from my fine art signature.) 

5.  The Finish
You can make several cards and I do suggest you make several.  You will be more relaxed and joyful after the first one is done.   You will find that the more you make the more ideas you will have.  Your mark making will reflect your building confidence.  
If you have time make originals for everyone, if not, take your card to a shop and have it photocopied onto cardstock.  Either way, those SPECIAL people will be thrilled when they see what you have done. 

Looking for Help to start your Card Making: 
I have a video "Learn to Draw with Christmas Tree Cards" that will give you more ideas on making your Christmas Tree Cards.  

I have 2 Card Classes Scheduled: Tuesday, Dec 7,  2-4pm  & Saturday, Dec 11, 10-12:30pm 
Small group (3), all materials supplied, Beginner to Advanced Welcome, $50 each.  Walnut Grove area of Langley.  Contact Wendy to register

Looking to Move your work to NEW LEVELS?  

Contact Me for:

1. Private Drawing Lesson: (3 Sessions 2.5 hr each $250)
Do you want your animals to breath, your flowers to sparkle or your people to walk?  Whatever subject your like to paint or draw I can build a drawing program for you.  Private Lessons allow you to focus on the skills you wish to develop.  Wendy is a experienced teacher, providing a calm, relaxing experience as you learn how to use the principles of drawing.  Beginner to Advanced are welcome.  Special rates for younger students.  More info here.

Be sure to like and share my posts.  You won't miss a single post if you Follow by Email 
Have a great Artful Day,
Wendy

Apr 23, 2021

How to Draw Ferns: Outdoor Sketching - Painting & Drawing Tips

Do the bright colours of the lush foliage in Nature defeat you?

CASCADING - 


When you head out to sketch are you happy and excited with all that Nature has in store for you?  Does the sunlight dancing on the branches give your heart a jolt?  Do you find yourself admiring a mossy tree stump nestled up to a bank of ferns?  

Then suddenly your heart is filled with despair. . . .

Moments of doubt fill your mind, how can this beautiful scene be captured.  Those lushes ferns are gorgeous but . . . where to start? how to capture the moment?  Your heart and smile begin to droop.  

Hold on a minute . . . 

Ferns like every element in nature are drawable.  You just need a plan.  Those lush ferns are probably sword ferns, the more common fern found on the west coast.  They are beautiful, I agree.  One of my favourite  things to draw.  They look awesome in an ink drawing, so much movement and bounce to them. 
 
A Lush Full Sword Fern - begging to be drawn.  This picture is available as a Printable Download Here.    

Let's Draw but First, Parts of a fern.  

When looking at ferns, note how the pinna is attached to the stem.  


How to Draw Ferns
1.  Sketch a layout focusing on the stalk.  
Like any new element you need to first study it and determine the patterns.  The sword fern has a very identifiable stalk.  Draw the stalks to set up your plant.  Leave spaces between the lines to allow for the pinna (leafy part) to be added.  Rather than make generic lines, pick particular fronds to draw.  Of course you won't be able to fit them all in your picture so pick an interesting selection that will represent the plant.  

The Beginning - The lines represent the stalk of the fronds I will draw.  Can you figure out which ones I choose to draw?  


2.  Start Drawing - Front to Back

This is a little different from painting where we often start at the back and move forward.  I use ink to draw and front to back is very important.  Box in the shape of the frond with your pencil as a guide to drawing the pinna along the stalk. 

Start Front to Back in the Drawing Process: Drawing the shape of the frond and then use a pen to ink in the pinna's will help keep things in place.  

As you draw in a frond, notice what is happening with the pinna.  They are not all the same length.  They do not all go straight out.  You do not often see individual ones. They are often in groups of 2 or more.  They turn and twist to follow the bends in the stalk.  

Draw Systematically, one frond at a time and work around the plant.  (Always the one in front first) 

3.  Build your fern plant, one frond at a time

Work in layers front to back. 

I love this part of the drawing.  I have picked out my front frond and drawn them 1 at a time.  Note the spaces between them.  There is already a sense of 'bounce' to the fronds. I will decide which fronds underneath to include as I begin to fill in the spaces between my main fronds. 

Add the Shading - choose your darkest spot and let everything else be in relation to it.


4.  Add your shading and more detail. 

No matter whether you are painting, sketching with pencil or drawing with pen you need to stop and study your shadow patterns.  Just like you looked for patterns you need to look at the value of the shadows.  Those dark holes are not solid blobs of black: rather dark and light as things are hidden in them; edges are soft and hard depending on the location.  Often the soft shadow extends to the neigbouring fronds.  

This is where I start filling in the spaces.  Sometimes with bits of detail to suggest a frond and sometimes adding the frond.  Although the center of the plant looks quite dark in the picture it is important to 'suggest layers'.  You do not want a large black hole in the middle of your drawing. 


You can see in my final picture that I added a few things below the fern to ground it.  I also added/suggested more fronds in the shadows.  Note the layers of shading, they give a sense of  depth to my fern.  
Try drawing along with me, the reference picture is available as an instant download HERE.   Now is the time to get organized for Outdoor Sketching. Here are a few other posts to help you on your way.  

Other Posts of Interest:
5 Tips to Get You Ready for Outdoor Sketching : includes video and downloadable PDF
3 Ways to Mix Watercolour on Paper : Step by step diagram and video examples. 


OUTDOOR SKETCHING SEASON  Coming up Fast!!

Starting Wednesday, May 12: 10am - 12:30pm 

Twice a week, Wednesday and Saturday mornings, I will take small groups out for Outdoor Sketching.  Get Tips and Techniques for Sketching in Nature.  Beginners to Advanced Welcome. Max. 3 per class.

Mediums supported: pencil, pen, watercolour, watercolour pencils and coloured pencils 
Location: Parks in North Surrey and Langley
Cost: $50 per session

Supplies: Bring your own supplies, don't hesitate to contact me about your supplies
Rainy Days: Not fun to plein air in the rain.  You can defer to another available day or join me in my studio and work with me. (when Covid rules allow small inside gatherings) 

Contact Wendy to Book Your Spot!! 

Looking to Move your work to NEW LEVELS?  

  Online Coaching/Teaching  (3 sessions 30 minutes each $75)

Are You and Your Inner Critic looking to expand your discussions.  Here's how it works: Send me a few pictures of your paintings.  I will prepare material to facilitate a discussion based on your goals.  I am a sounding board, coach and teacher,  with suggestions, techniques and tips to help you meet your goals and move your art forward.  More info here.   Looking forward to Zooming with you.  
  
Many find this post helpful: Turn your Inner Critic into your BFF

Be sure to like and share my posts.  You won't miss a single post if you Follow by Email 
Have a great Artful Day,
Wendy