
 |
| My Endless Nature Journal - Love mixing the Black & White with Colour |
Their detailed maps, as my grandson calls their instruction booklets, make it so anyone can build with them. It really is quite amazing.
An Endless Nature Journal or otherwise called Perpetual Nature Journal is just like that. I was reading about them and after trying one, I realized they fit right into my life.
5 Ways to Bring Depth into Your Work
Thursday, Feb 6, 13, & 20, 6:00-8:00pm PST (Zoom)
$75 Before Oct 8, $90 after
Using Pencil, Pen & Watercolour, Wendy will demonstrate how each step of your process has secrets that can add Depth to your work. Contact Wendy to Register
***
For more discussion and examples see my YouTube Video "What is a Never-Ending Nature Journal.
*************** *************** ***************
Here’s how they work. Each page in your journal is created in small pieces focused on Nature. In my case, I go walking every day with my dog and as I walk, I pick up some little leaf, some little flower, some little twig. . . I bring it back and draw it on my page. As the page fills up, I move onto the next page and do the same. It's constantly starting small and building to fill a page. Sounds simple, right!?
 |
| Starting with One Shape from Walk |
First of all, as you’re walking, you begin to notice your surroundings more. Whether there's rain or sunshine, snow or mud, there’s always little pieces of stuff; little branches, little leaves, something that will catch your eye.. Your eye becomes more tuned to interesting shapes, lines, shadows, colours. . .
 |
| As the page develops you weave the shapes under and over |
One of the things I noticed, was that even though it’s December, there’s actually still some little flowers out there, hiding in little nooks and crannies. OK, I realize I live on the south coast of Canada and we don’t get a lot of snow, but still, it is dark, dingy, wet and cold, many days and so surprising to see some little flower hiding out.
 |
| More interesting to add different Shapes |
The second thing I noticed is as I entered these items onto my page. I had to think about composition. Where could I add my new piece? Should I just draw one? Should I repeat it several times. How big should it be? Don’t forget my entries are made day by day so the page develops, just like those Lego blocks, and the composition becomes harder and harder to deal with.
 |
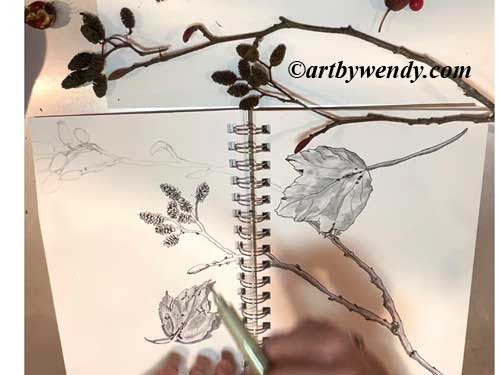
| I liked mixing colour with my ink and pencil |
Once I placed my pieces, I began to think about colour, shadows, values. As you know, I like my pen and I love my pencil, so I’m very drawn to ink drawings, but then sometimes it looks nice to have a bit of colour on the page too. Here’s a chance to use some of those materials you don’t often use coloured pencils, watercolor, pencils, pastels. They can all fit onto these journal pages.
Of course, drawing all these little pieces from life really does improve your drawing skills. There’s no doubt about it. You’re just more aware of shadows and shapes how things curl and bend. And how to make those curls and bends as you draw.
 |
| Building the Page, piece by piece. I am thinking of adding Coloured Pencil over some of the pencil work |
I discovered interesting things; I enjoy weaving, branches, and twigs in and around and under. That can be a challenge too as remember I’m drawing in ink. Something, I drew two days ago suddenly look looks more interesting with something under or over top of it. I found too, I was really paying attention to the shapes that I saw. Sometimes I was looking for certain shapes that I thought I’d want to put into a certain page of my book.
 |
| Just a few of my Friends - fortunately no bugs, but hey, maybe draw them too!! |
There is a downside, if you wanna call it that. All the little bits and pieces that you bring home, become your friends. I am always bringing pieces home from my walks and thus I have containers sitting on my desk, full of twigs and branches and dried up leaves. The more dried up the leaves. the more interesting they become. And how can you throw them away after you’ve just spent so much time with them. They take on a new life, when you see them painted and drawn on your page. And of course you may want to add them to another page. See what I mean, hard to get rid of them.
I am really enjoying my journal and it has really liven up my walks. Now I am constantly looking for different shapes and coming home with a 'handful' of new friends.
Try walking in your area, see if you can find a few 'friends' to bring home and draw.
For more discussion and examples see my YouTube Video "What is a Never-Ending Nature Journal.
*************** *************** ***************
Enhance Your Drawing/Painting Series – 5 Ways to Bring Depth into Your Work with Wendy Mould.
Thursday, Feb 6, 13, & 20 6:00-8:00pm PST (Zoom)
Using pencil, pen and Watercolour, Wendy will demonstrate how each step of your designing process has secrets that can at Depth to your work. Early Bird $75 After Feb 4, $90 2hr Classes Max 15. Suitable for Beginners to Advanced. Contact Wendy to Register


