Feb 28, 2019

Glazing Watercolour with Soft Edges - Painting and Drawing Tips

Stand Square.  Line up to the broom.  Bend down and grab the Rock. 
 Move back. Then Push off, Glide, Release. . .

That's it!!. . .

What happens to your curling rock now, is in the hands of your sweepers and the skip.  Skip calls the line and the sweepers call the weight.  All you can do is watch and wait. . . .

JUNCO: ALERT AND READY -  6 x 6 watercolour mounted on wood cradle $115

Curling is fun, exciting, stressful, disappointing, rewarding, confusing. . .    I could go on. But I think you know what I mean.  One minute you feel like a million bucks because you executed the shot of a lifetime.  The next, you are in the dumps because with a bang and boom your rock is gone.

Sounds a little like your life with a painting, eh?

Certainly it is your life when you are glazing. 

Glazing is adding a thin layer of colour over an area you have already painted.  (You can learn more on the ins and outs of glazing with watercolour starting here. )

JUNCO: PERCHED - watercolour mounted on 6 x 6 wood cradle $115

When you look at "Junco: Perched" there are several examples of where colour was glazed over colour.  The purpose, as you can see was to let the underlying colour show through while putting something else on top. Within the context of the bird those areas start with a hard edge and often finish with a soft one.  I used the blended edge described in the last post

However, sometimes you want to glaze over an area and you need to have soft edges all around.

WIP -  Note the orange to the left of the birds head and compare it to the finished one at the top 
No big deal.  Slap on the paint and move on. . . .

Doesn't work that way.  You paint over that an area and you will leave some pretty hard edges. Just fine if it's in the foreground.  But sharp detailed edges like that in your background wont work.  You need soft edges.
BEFORE THE GLAZE: Note the area inside the box

There is a secret weapon - Your spray bottle
Spray the area lightly that you want to glaze over.  Make it larger than the area you want to cover.  That's the easy part.  The Set Up.  Just like throwing that rock in curling.  (Using a sprayer means you are painting wet into wet without brushing on that layer of water.  This means you are not disturbing the dry layer already there.)
c
Bubbles down, time for glazing.  Note the water has not fully soaked into the paper.  Once it does the colour underneath will loosen very easily.  You don't want that. 

Now take your wet brush with your paint and paint the area you want to cover.  The beads of water on the paper should make it wet enough for your brush to slid over the area.  One Stroke.  Just like throwing the curling rock.  One slide out and release.
Putting on the glaze, don't work it.  Lay on the paint and get out.  Note how thin it is. I want my underlying colours to shine through.  That big puddles forming on the lower right side, I will dry up with a dry brush.  

If you fiddle with your brush. If you wait for the beads of water to sink into your picture before you start.  If you stroke several times - All of these things cause you to loosen the paint below and mix it with your glazing colour.  You will loose that transparent look and you may also turn everything to a variation of muddy gray.
It's Dry - note how thin it is but still it did bump up my orange area, leave the blue untouched underneath and even though there are a few edge lines from it, they are very light.  Not something that is going to draw the eye to the background.  

Yes, it is stressful. . . There is nothing you can do now but wait . . .and watch.  Just as I watch my rock, curl down the ice.  The skipper will call the sweep, to keep it in line, to speed it up or leave it alone, to glide to its spot.  I can only Watch. and Hope.  You can only watch and hope too. Once you put down that glaze you need to wait and see the results.

When the rock stops, the team evaluates.  Was it too heavy? Too light?  Did it curl more or less than expected?  Does something need to change for next time? What to do now. 

You do the same.  
When the glaze dries - Evaluate.  Was it dark enough? Do you like the new colour formed?  (Don't forget colours change when they are put on top of another colour.)  Does it need another layer? Make a plan and move forward. Repeat the steps if needed. Make changes if needed.  It is easier to add another layer than take one off.  So make those layers thin and don't worry if you do them more than once.  I often do 3 or 4 or more.  1 seldom does the trick.

JUNCO: READY TO FLY - The third Junco in my group - 6 x 6, watercolour on wood cradle
Birds are painted and I am on to new things.  Next week I am Stepping Out with an interesting new combination of mediums.  I think you are going to chuckle when you see what I'm using.


My Etsy Store is always OPEN: Etsy - WendyMouldsArt

Originals, prints and Instant Printable Cards for all Seasons available.


Coming Up Quickly

March 8-10 - The West Fine Art Show - Spring Edition

Friday, March 8, 7-9pm, Saturday March 9, 11-7pm, Sunday March 10, 11-5pm

Yorkson Creek Middle School,
20686 84 Ave, Langley     www.westart.ca
In support of the Langley School District Youth Homelessness Initiatives

It is very exciting to be part of this show, an awesome collection of some of the fine artists in Western Canada.  Our art focuses on life on the west coast but . . . oh so many different ways of seeing it.  Of course, you know I will be there with my birds and animals.  Lots of new things to share with you.  See you there. 

Artists reading this post also find the following valuable:

Is Your Sketchbook Ready for You?

 Be sure to like and share my posts.
You won't miss a single post if you Follow by Email or Like my Facebook Page.
Have a great Artful Day,

Wendy

Feb 21, 2019

Step-by-Step Glazing with Watercolour - Painting & Drawing Tips

READY TO TAKE THE PLUNGE!!

When you jump off the cliff into the cool waters below, it is a leap of faith.  Well, for sure it is the first time.  But after that . . . well now, you know how much fun it is.  So now you are running up the trail, ready to JUMP again. . . .    Super Fun.

That's how glazing feels for me. . . .


JUNCOS AT THE FEEDER - 8 x 10 watercolour on board $200

I love the subtle ways I can alter colour and value in my painting.  I love the way I can take a dark and have it thin.. soften .. disappear.   I think this must come from all my graphite work.  I love the way I can sculpture a shape with values to make it appear 3 dimensional. I know, don't get me started.  I did say I love the effect. (see last post on the What's and Why's of Glazing)

Ready to Jump In? . . . .

Here's how to Glaze from Dark to Light or also called the Blended Edge

Things to think about as you work:
1. Is your brush damp, dry or dripping wet.  I know, this is a constant for watercolourist.  I work with a paper towel in my other hand so I can always dab my brush to control the water.
2. Pigment and water runs from the wettest area to the drier area
3. Watercolour dries lighter then it looks when wet
4. Colours below must be dry before adding a layer on top
5.  Working over an area too much (fiddling) will cause the colours below to mix and you could end up with mud.  Remember, like that cliff, you jump, your Done.  Can't stop in mid air.  But . . There is always a next time.

Bend your knees, get ready to jump . . .
For the feeder post in 'Juncos at the Feeder' I want sharp edges and soft edges with my colour.  The pipe of the feeder has a dark shadow on the right side (my sharp edge).  But that shadow gets lighter as is approaches the light.  This will be my soften edge.

With a soft wet brush I apply the dark paint to the dark side of the post

Step 1 - I applied a dark wet layer of paint onto a dry layer of paint along the edge of the post.  Not too dark as I want the colour and line work underneath to show when done.

Remember, Work Quickly before your paint dries. 

Step 2  - Working VERY quickly, I'm talking quick here.. I wash my brush, dab it on my towel and touch it too the EDGE of the paint I just put down.   This must be done quickly or the paint you put down will be dry and the pigment will not move.  Your brush must be wet enough to cause the pigment to flow away from the darker area. So damp but drier than the wet paint you just put down.   If it is wetter than the painted area, the water will run into your painted area and create a backwash.  Not a pretty site and hard to fix.

New stroke goes to the edge of  your stroke in Step 2 

Step 3 - Working VERY quickly I wash my brush, dab it on my towel and touch it too the EDGE of the stroke I put down in Step 2. Yes, this is a repetition of Step 2 but starting further left, that Step 2.   Notice my brush is now a full stroke AWAY from the painted area.  For Success, Your brush must be wet enough to cause the pigment to flow away from the darker area.  Even though you are further away from the fresh painted area - If your brush is wetter than the painted area the water will run into your painted area and create a backwash.  Not a pretty site and hard to fix.

Step 4 - Quickly repeat Step 3 several more times.  Each time moving FURTHER AWAY from the dark area. Always starting at the EDGE of the last stroke.  Repeat until you are no longer drawing pigment from the darker area or in my case at the edge of the post.

Note how dry it is and how soft the blended edge is

 Once my brush stroke is running clear, I do one more stroke.  Then stop and let things dry.  If you are still drawing pigment with your stroke and you stop, the pigment dries at that edge and leaves a line. It's there for life.  With colour underneath you do not have the luxury of lifting that pigment because any scrubbing you do will lift the colours underneath.

Note how light the finished wash ended up. Way to light.   I am not concerned, I will put on several more layers when it is dries.  But I do want to see how my colour is working.  I need to decide how much value I want it to have while still letting my line work show. So I will slowly sneak up to the Value I want by glazing layer after layer.

JUNCOS AT THE FEEDER - Side View 

Final Notes: 
Go back now and look at the final picture.  You can see many places in the picture where I have used this technique - feathers on the birds, the snow shadows, the bent pipe.  The glazing on the birds might have been only 1 or 2 layers but the post and cup were more. 

Remember it is always easier to darken with another layer but like that cliff jump - once you jump, you are done!  Work up those values gradually rather than slamming them with a dark.  Be Patient. Just like the Jump - enjoy the free flying into the air, the sudden dip into the water and the excitement of scooting back up for another jump.  The Process is yours to enjoy.

 Of course, it goes without saying, practice, practice practice - getting the water right, catching just the edge and doing it in one stroke, takes practice.  But the results are worth it.

Have fun with this.  It is such a wonderful stroke you will find yourself using it everywhere in your painting when you want that dark to light, hard to soft spot.

One more post on glazing coming up - getting that all around soft edge when you glaze.  See you next week.


My Etsy Store is always OPEN: Etsy - WendyMouldsArt

Originals, prints and Instant Printable Cards for all Seasons available.

SAVE THE DATE
March 8-10 - The West Fine Art Show - Spring Edition
Friday, March 8, 7-9pm, Saturday March 9, 11-7pm, Sunday March 10, 11-5pm
Yorkson Creek Middle School,

20686 84 Ave, Langley     www.westart.ca
In support of the Langley School District Youth Homelessness Initiatives

It is very exciting to be part of this show, an awesome collection of some of the fine artists in Western Canada.  Our art focuses on life on the west coast but . . . oh so many different ways of seeing it.  Of course, you know I will be there with my birds and animals.  Lots of new things to share with you.  See you there. 

Artists reading this post also find the following valuable:

Is Your Sketchbook Ready for You?

 Be sure to like and share my posts.
You won't miss a single post if you Follow by Email or Like my Facebook Page.
Have a great Artful Day,

Wendy

Feb 14, 2019

Using Glazes to Finish the Background - Painting and Drawing Tips

Do you play the slot machines?  

Drop in the money, pull the handle, Bing! Bang! Boom! you win or lose.  You're Done! No second chance, everything happens in that one pull.

Golden Finch & Apple Blossoms - 10 x 8 watercolour on wood cradle $200 
Of course you are going to tell me that you can always pull again. But, that is with new money.  Things are different.  

Glazing with watercolour is just like your Slot Machine . . .
You only get one chance.  One pull with the brush, then you have to leave it.  That is the hardest thing because believe me.  It. Is. So. Easy. To. Fiddle.  You know what I mean.  Run over it again with the brush.  Dab a bit.  You know, Fiddle.  

What is glazing with watercolour?
Glazing is putting an overlay of watercolour onto colour that is already dry on the paper.  Thus allowing the colour underneath to show through.  

Why would you want to glaze over a colour?
There are many reasons:
1. to adjust the value by making the area darker
2. to modify the colour of an area
3. to give richness to an area as both the top colour and the colour underneath will show. 
4. to build on the illusion of depth (very useful in backgrounds)

Things to think about as you glaze
1.  The painted surface must be dry and paint set so you do not mix it into the new layer you are adding.  If you do, you lose that transparency look you're looking for. And worst you might end up with mud.
2.  To get a true transparent look you need to use transparent watercolours.
3.  Your glazing layer should be thin to keep it transparent so you will be doing multiple layers. Each layer must be dry before adding the next layer.  (see note #1)  Check for dryness by touching paper, if cool it is still wet.  I generally use 3 or 4 layers but some places may take more. 
4. Use soft brushes as a stiff brush many lift colour and leave brush lines
5.  The colour layer you are adding will change the colour layer underneath so you may want to have a test sheet handy to see what will happen. 
6. Watercolour dries lighter than it looks when applied. 

Want to see what glazing can do? . . .
Below is my Golden Finch & Apple Blossoms.  At the left is my picture at the starting point. I used frisket to protect my mid-ground and foreground areas as I applied the background wash.  (see post of Saving Whites )  I then removed the frisket and painted the mid-ground and foreground.  This is where the glazing happened as I made changes to the background.  In some areas I wanted to darken it alot, as you can see with the leafy area in the bottom right hand corner. That took several layers.  Can't say how many as I lost count.  I just kept letting it dry, checking the value and adding more.  

Not the difference in the background areas when I made adjustments with glazes.  
In other areas I added only a light glaze.  Note the suggested flowers in the background.  One is just to the left of the bird.  Those suggested blooms did not look like they were in the distance, they were too bright.  A thin glaze of purple set them back.  

Glazes can make a Big Change  . . 
There were two areas where I made the big changes in my picture.  One was the areas glazed with Winsor Blue - Green Shade (WB).  That was not one of my original colours.  I was just going to use Ultramarine however, I found that did not add enough zip to my picture.  (Remember that post last month on Visual Complements)  I tried glazing with a bit of WB and really liked how my yellow started to sparkle.  You can see in the picture how much it not only darkened but added life to the greens.  

The other change was in the bottom left corner where I used Permanent Rose as a glaze.  Here I created a leaf shadow.  I left the edge a bit rough to really make it 'leaf like'.  This seemed to subtly add another layer to my background. I really liked that. 

Interested in playing with glazes a bit more? 
Next post is glazing with hard and soft edges - step by step.  Are you a glazer too?  I love the mix of glazing and opaque colour to create my wildlife paintings.  

This little paint is a watercolour painting which I have mounted on a wood cradle .  Here is a side view.  (To see mounting watercolour paper on a wood cradle and paint techniques )

GOLDEN FINCH & APPLE BLOSSOMS - 10 X 8 inch watercolour on wood cradle $200

My Etsy Store is always OPEN: Etsy - WendyMouldsArt

Originals, prints and Instant Printable Cards for all Seasons available.

Special Opportunity Coming Up:    1 Spot Left
Marketing Workshop - Let's Get Your Art Out There!!  
Sunday, Feb 24, 2019  10-3pm with Wendy Mould, AFCA

Need a focus for your Marketing Strategy?  Unsure where to start, where to head next? Marketing takes so much of your time away from the Studio, learn where to focus your energy and ways to maximize your time.  At the end of the day you will have plans and be ready for Action. 
 Cost $84 Tx Incl  

Working with Wildlife Artist Wendy Mould, AFCA bridges the gap between the Entrepreneur and the Artist in the Marketing World.  Contact Wendy to Register. 


Artists reading this post also find the following valuable:
Matching Colours to Values here
Playing with a Very Limited Watercolour Palette here
3 Ways to Turn Drawing Despair into Action here
How to Find your Starting Point here

 Be sure to like and share my posts.
You won't miss a single post if you Follow by Email or Like my Facebook Page.
Have a great Artful Day,

Wendy

Feb 7, 2019

Saving the Whites in Watercolour - Painting and Drawing Tips

Did you know Google has 8,380,000 results for How to Remove stains from White Pants!!??
Who knew stains and White Pants were such a problem.

Well, I guess actually I did, as I never wear white pants.  I know, they look so cool and crisp in the summer. And of course, an all white outfit looks so refined and elegant. But somehow with kids and pets always in my life, white pants just never seemed to work.

And we all know even with 8,380,000 suggestions NOT ALL STAINS COME COMPLETELY OUT. 

GOLDEN FINCH AND APPLE BLOSSOMS - WIP - note the blue barriers between the paint and white space

Working in permanent ink, watercolour and graphite, I am well aware that once you cover your white, there is no going back.  Sure, you can grab a small highlight with a white gouache in watercolour and maybe scratch off a bit of the ink. But really  . . . Your white is gone.

Like those pants, the stain is removed but there is still a slight, subtle bit of colour there.  New Pants coming up.

But watercolour has its secret weapon . . . 

Frisket - a liquid latex in ammonia.  Once exposed to the air, it turns to a solid which can be easily removed from your support.

I must admit I don't use frisket a lot.  I tend to wet the paper in a larger area than I want and rely on the barrier of dry paper to keep my white.  However, sometimes I when I have a larger area with lots of details impinging on it and I want the freedom of a wet wash. . .  well . . . You got it, when I am working on a loose background.  (See my previous posts on tips for working on Backgrounds starting here. )

Well then I bring out the Big Guns . . .

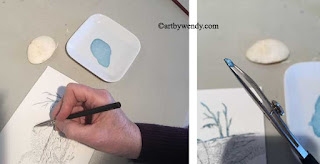
Few Materials are needed to apply the Frisket

There are a few secrets to using frisket. . . .

1. Pour the frisket into a small china dish (Dollar Stores are great places to find these)

As you work with the pen you will have to keep dipping it into the frisket.  Also it may become clogged but simply wipe it off and keep working. 

2.   Apply with round paint brush or ruling pen.  I generally use a paint brush but if I need a sharp detailed line I use a ruling pen.  ( a ruling pen is a common tool for calligraphy)  You can cover the whole white space with frisket but all you really need is a barrier.  I find sometimes the texture of the paper can be disturbed with the frisket so I tend to only use a thin barrier whenever possible.


Be sure and protect the brush with a thin soap film before dipping it into the frisket

2. Frisket is very hard on brushes.  Before applying frisket with a brush, dip it in water and slide it over a bar of soap.  This will keep the latex from affixing itself to the brush fibers.  Clean it as soon as you are finished.  Dedicate this brush for applying frisket.

In areas where the frisket completely covers the object you can paint right over it.  Make sure you paint right up to your barrier. 

3.  When the frisket is dry and solid, it is ready for a wash.  Approx. 20 minutes but I usually leave it longer just to be on the safe side.

The frisket will often come off in rubbery, stringy pieces.  

4.  When the wash is completely dry use the crepe rubber to rub the frisket and pull it off.  Run your hand over the surface of your paper to be sure you have it all. 

Frisket off and ferns and branches are ready to paint. 

5.  There are often rough edges, sharp edges or even little bits of paint at the edge of the frisket areas or on the other side of the barrier. (my fault not the barrier's)  Take a small wet brush and work the paint loose and lift it off.

6.  Now, you are ready to roll.

My Golden Finch, see top picture, is nearly finished.  I must admit the leaves in the foreground have been a challenge.  But next post, I promise it will be up and ready for you.  I want to share the final part of backgrounds - adjusting the colour and values with glazing. 

Not too late to Print you Valentine Cards for those special people in your life - Cards are Instant Downloads onto 8.5 x 11 inch cardstock.  I leave then as they are but they are fun to colour or add a few glitzy bobbles too.  See my Etsy Store

My Etsy Store is always OPEN: Etsy - WendyMouldsArt

Originals, prints and Instant Printable Cards for all Seasons available.

 Special Note:  Instant Digital Valentine Cards are now Ready - Print, Fold and Give.  They are great for Pet Lovers, featuring Cats and Dogs - of course Max was my inspiration for the dog drawing!

Special Opportunity Coming Up:
Marketing Workshop - Let's Get Your Art Out There!!  
Sunday, Feb 24, 2019  10-3pm with Wendy Mould, AFCA

Need a focus for your Marketing Strategy?  Unsure where to start, where to head next? Marketing takes so much of your time away from the Studio, learn where to focus your energy and ways to maximize your time.  At the end of the day you will have plans and be ready for Action. 
 Cost $84 Tx Incl  

Working with Wildlife Artist Wendy Mould, AFCA bridges the gap between the Entrepreneur and the Artist in the Marketing World.  Contact Wendy to Register. 


Artists reading this post also find the following valuable:
Matching Colours to Values here
Playing with a Very Limited Watercolour Palette here
3 Ways to Turn Drawing Despair into Action here
How to Find your Starting Point here

 Be sure to like and share my posts.
You won't miss a single post if you Follow by Email or Like my Facebook Page.
Have a great Artful Day,

Wendy