 |
| FANTASY FLOWERS - Sketchbook Activity |
*** Further discussion can be found on my YouTube video: How Dark Values bring your Artwork to Life
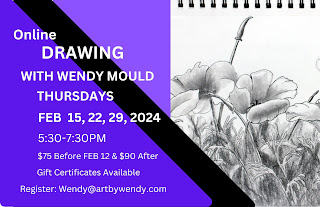
*** Looking To Join Me for Online Drawing Lessons? 3 Live Online Classes in February. See below for more information
________________________________________________________________
Follow Along with me as I conduct my experiment or better still, start painting too.
 |
| Step 1 - Background in 3 different layers of lights |
Step 1
Create a very light background of splashes and spots. I used the colours I was planning to use for my flowers. I only thought was to leave a space for my main subject. But at the same time I wasn't worried about getting paint in that area as it was light.
Step 2
I did 3 different light layers of splashes. Each slightly darker than the first. I was also thinking that I wanted to get darker closer to my subject.
 |
| Drawing in the Flowers |
Step 3
Drew in the fantasy flowers. A rose with a few little forget-me-note around it. I wasn't worried about any of the colours under the flowers, as I knew it would be covered up by painting the flowers.
 |
| Blocking in the Flowers and Some Leaves |
Step 4
Here is where the fun begins. I blocked in the flowers and they looked horrid. No life to them. I press on. I had to remind myself this is just the first layer.
 |
| Darken the Rose Petals |
Step 6
I mixed a purple with my pink and blue and used that as shadows around the petals. Now that made quite a difference.
I also placed a real DARK in the crevices around the rose, being mindful that the light came from the left. Right away I could see some of the petals on the rose perked up. Even the main leaves started to look more interesting.
 |
| Suggesting more leaves in the Background |
Rather than bumping up the shadows more with the flowers I adding more foliage around them. I kept it lighter than than my fully drawn leaves but made it darker than the leaves suggested in splatters. Right away I could see things were really popping.
 |
| Finished - FANTASY FLOWERS - Sketchbook Activity |
Put some of that purple on the blue flower (center, left) and on the leaf (center, right) close to the rose; suggested some leaf shapes at the lower bottom; went back and added a few dark splashes to the shapes spreading out from the middle. It was popping!!
Things that I noticed (learned)
1. Putting a darker pink on my rose didn't do anything. It needed that dark purple to pop.
2. Putting a deep dark in the crevices where I would expect to find a dark, made a real difference.
3. Sometimes it is better to darken things around the subject rather than just getting darker and darker with the subject.
4. Not all of the subject needs to be the dark: ie. not all the petal, not all the leaf, not all the blobs
Experimenting can be fun. We had 3 days of major snow, and nothing moved. Very unusual for us. It was great to play with the flowers and not worry about being snowed in!!
*** Further discussion can be found on my YouTube video: How Dark Values bring your Artwork to Life
Online Drawing Classes for February 2024
All inclusive 4 Day Art Retreat, June 21-24, 2024
Outdoor Sketching Classes this summer 2024
 |
| Enhance Your Drawing Skills |
Come Draw with Me
“I attended an online drawing class from Wendy. I loved it and learned so much. She is very thorough and provides terrific feedback on your works of art. I highly recommend it.”
Ready to Enhance your Drawing Skills and Explore new Mark-making Techniques in a relaxed, fun setting?
During your Lessons You will:
- Learn when it’s best to erase and when to wait
- Dive into the little Secrets that make drawing a success
- See how light can transform your subjects
- Make friends with your inner critic and make it work for you
- Nail down that perfect perspective and proportion
- Use lines, shapes, and shadows to guide your viewer’s eyes and keep them engaged in your work
Early Bird $75 Before Feb 12, $90 after
Contact Wendy toRegister
Gift Certificates Available


No comments:
Post a Comment